


There’s something irresistibly comforting about a plate of pillowy, tender Homemade Italian Gnocchi—those little clouds of Italian delight that melt in your mouth and carry the flavors of rich sauces and fresh herbs with every bite. While store-bought gnocchi may be a convenient shortcut, Homemade Italian Gnocchi opens up a world of culinary creativity and satisfaction. In this simple guide, we’ll unravel the secrets behind crafting perfect Homemade Italian Gnocchi from scratch, transforming humble potatoes and flour into a timeless dish that’s both rustic and refined. Whether you’re a kitchen novice or a seasoned cook, get ready to roll up your sleeves and embrace the joy of making Homemade Italian Gnocchi the authentic Italian way.
Mastering Homemade Italian Gnocchi begins with selecting the right potatoes—this is the foundation for irresistibly fluffy, cloud-like pillows of dough. The secret lies in picking starchy potatoes such as Russets or Yukon Golds. These varieties contain less moisture and more starch, ensuring your Homemade Italian Gnocchi dough won’t turn gummy or dense. Avoid waxy potatoes like red or new potatoes, which hold too much moisture and produce gluey results. After baking or boiling the potatoes whole (skin on), let them cool slightly before peeling and mashing to maintain the perfect balance of dryness and tenderness in your Homemade Italian Gnocchi.
Choosing the Perfect Potatoes for Fluffy Gnocchi
For an airy texture, use Russet potatoes—their high starch content absorbs just the right amount of flour during mixing, resulting in light, pillowy Homemade Italian Gnocchi. Yukon Golds are also a wonderful choice, lending a golden hue and subtle buttery flavor to your Homemade Italian Gnocchi. After cooking, mash the potatoes while still warm but not hot, breaking up lumps gently with a ricer or fork to avoid overworking the starch. This step ensures that your Homemade Italian Gnocchi dough will be soft yet firm enough to handle, giving you the confidence to master every batch.
Crafting the Ideal Dough Texture for effortless Rolling
of Homemade Italian Gnocchi
The dough for Homemade Italian Gnocchi should feel smooth, slightly tacky but never sticky. Start with chilled, mashed potatoes on a floured surface and add all-purpose flour gradually to control moisture. Incorporate a small amount of beaten egg and a pinch of salt for structure and seasoning. Resist the temptation to over-knead—overworking develops gluten, making Homemade Italian Gnocchi tough instead of tender. Combine gently just until the dough holds together in a cohesive, silky ball. If it’s too sticky, a light dusting of flour will help, but be careful not to dry it out. This balance is the key to creating authentic, melt-in-your-mouth Homemade Italian Gnocchi every time.
With patience and practice, mastering the steps above ensures that your Homemade Italian Gnocchi will always be delicious, versatile, and ready to pair with any sauce, from rich ragùs to delicate butter and sage.
Shaping and Cooking Techniques to Elevate Your Gnocchi
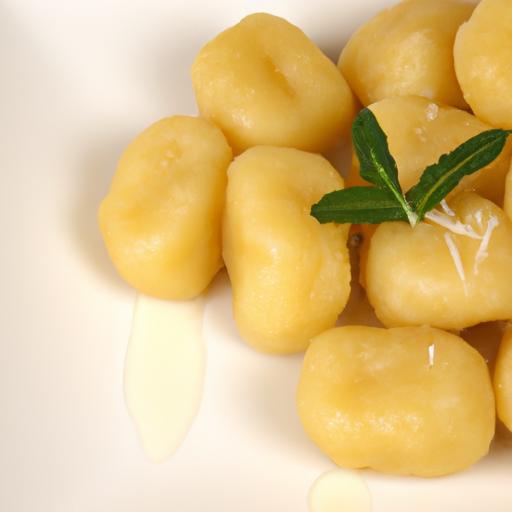
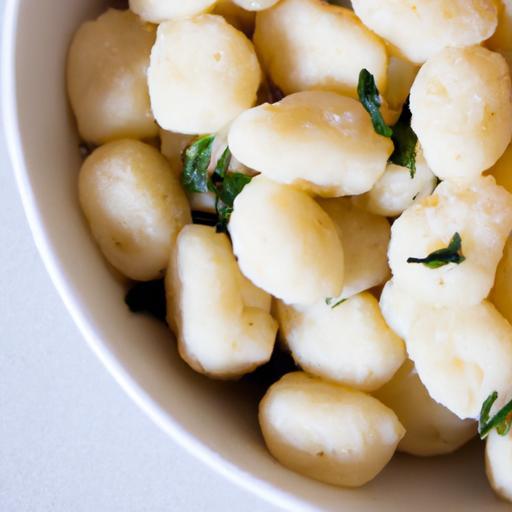
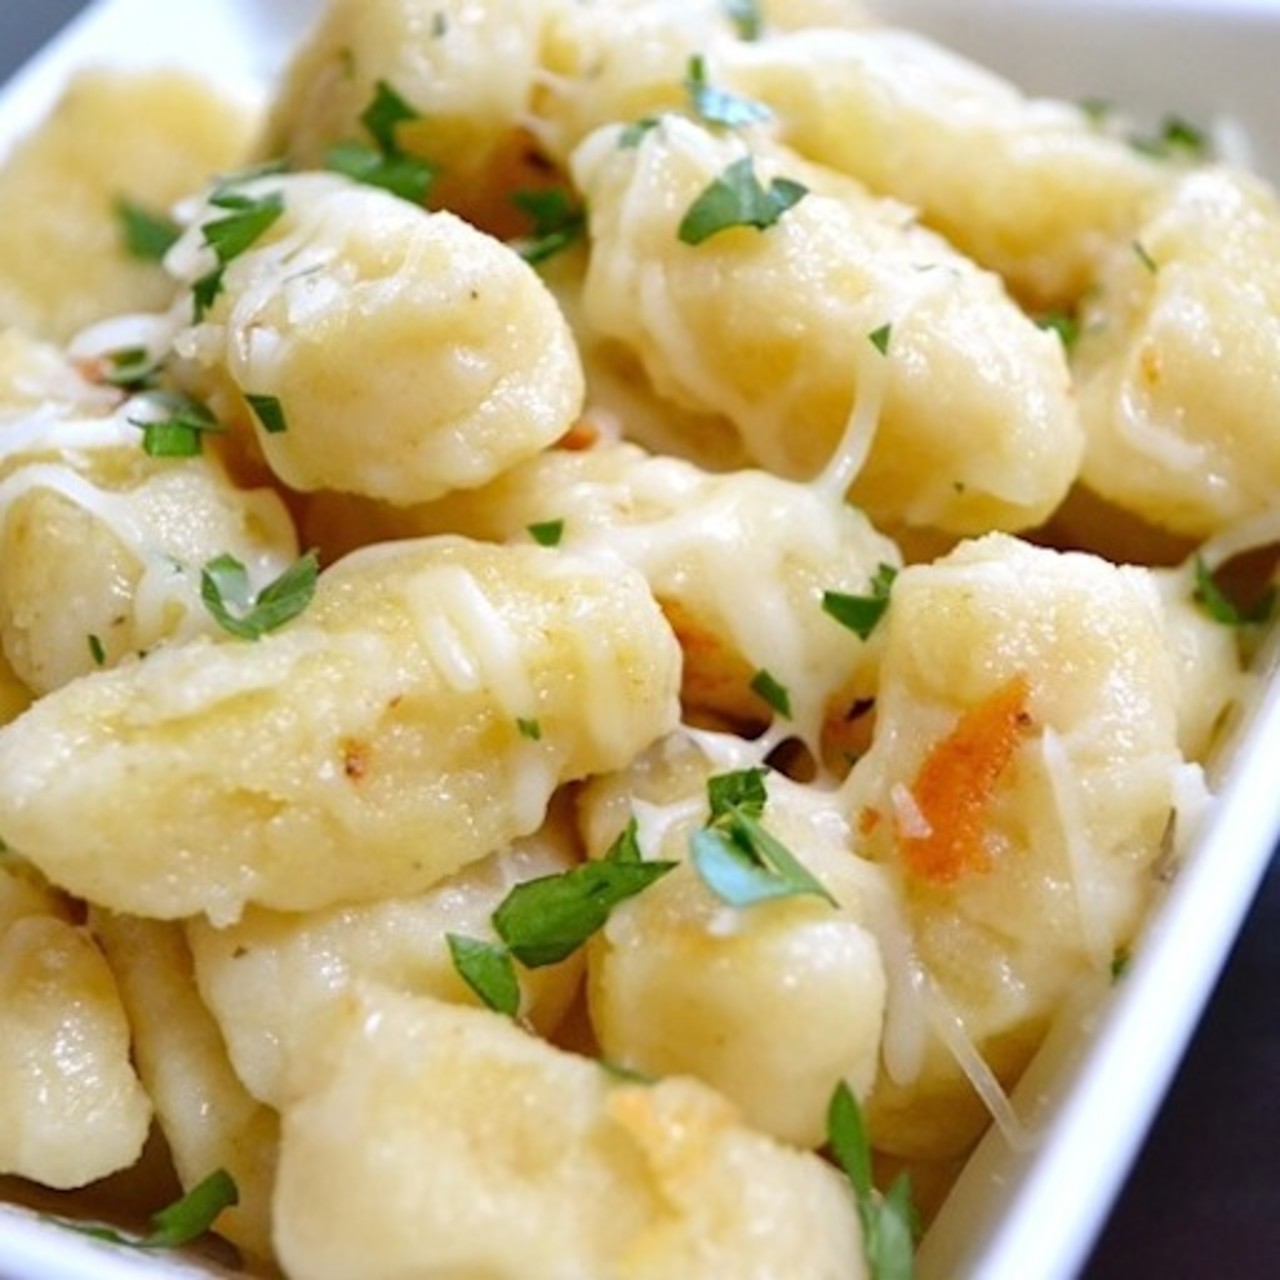
Divide the dough into portions and roll each into long ropes about ¾ inch thick. Cut into bite-sized pieces and finish with a classic fork press or gnocchi board to imprint ridges-these beautifully catch sauces. When ready to cook, boil salted water and add the gnocchi in batches. Watch carefully; they cook quickly, floating to the surface in about 2-3 minutes, signaling they’re perfectly tender. Use a slotted spoon to transfer them gently into your sauce or a warm plate. For a golden finish, pan-searing after boiling adds delightful crispness and depth.
Delicious Sauce Pairings to Complement Every Bite
With your tender gnocchi, sauces are were creativity shines. A simple brown butter sage sauce complements without overpowering, with fragrant herbs and nutty richness fluffing every bite. For a heartier feel, swirl through a creamy Parmesan sauce or pair with a zesty roasted tomato and garlic ragù. even a fresh pesto or light herb vinaigrette makes a refreshing counterpoint. Garnish with freshly grated cheese, a sprinkle of cracked black pepper, or toasted pine nuts to elevate the final presentation.
Prep and Cook Time
- Prep Time: 30 minutes
- Cook Time: 15 minutes
- Total Time: 45 minutes
Yield
Makes approximately 4 servings (about 40 gnocchi pieces).
Difficulty Level
Medium – Perfect for those familiar with basic dough techniques but approachable for adventurous beginners with patience.
Ingredients
- 2 pounds Russet potatoes (about 3 large potatoes), unpeeled
- 1 ½ cups all-purpose flour, plus extra for dusting
- 1 large egg, lightly beaten
- ½ teaspoon fine sea salt
- Butter and fresh sage leaves, for serving (optional)
Instructions
- Preheat your oven to 400°F (200°C). Pierce potatoes with a fork and bake directly on the oven rack until tender, about 45 minutes. Alternatively, boil whole potatoes with skins on until easily pierced by a knife.
- Allow potatoes to cool just enough to handle. Peel skins away and mash promptly using a potato ricer or fork. Spread the mashed potato on a clean surface to release steam and cool wholly.
- Sprinkle the salt and flour over the cooled potatoes. Make a well in the center and pour in the beaten egg.
- Using your hands, gently fold the ingredients together, kneading just until a soft dough forms. Add small pinches of flour if the dough is sticky, but avoid adding too much.
- Divide dough into 4 equal parts. Roll each into a ¾-inch thick rope on a floured surface.
- cut ropes into 1-inch pieces. Roll each piece gently over the back of a fork or gnocchi board to create ridges.
- Bring a large pot of salted water to a boil. Add gnocchi in batches, stirring gently to prevent sticking.
- When gnocchi float to the surface (about 2-3 minutes), use a slotted spoon to remove and transfer to sauce or plate.
- for extra texture, sauté boiled gnocchi in a hot pan with butter and fresh sage leaves until golden brown, about 2 minutes per side.
- Serve immediately with your favorite sauce and garnish.
Chef’s Notes
- For a lighter dough, avoid overworking and keep flour addition minimal.
- If dough feels dry and crumbly, moisten your hands with a tiny amount of water to help bind.
- Store uncooked gnocchi on a floured baking sheet covered with a cloth and freeze for up to one month; cook directly from frozen.
- Use a potato ricer for the smoothest texture; mashing by hand can create lumps that affect shape and bite.
Serving Suggestions
Present gnocchi in shallow bowls with a swirl of sauce and freshly grated Parmesan or Pecorino Romano. Add vibrant green accents with chopped basil or parsley. Toast pine nuts or sprinkle cracked black pepper for extra crunch and spice. A crisp green salad or roasted vegetables make perfect companions for a well-rounded meal.
| Nutrient | Per Serving (1 cup) |
|---|---|
| Calories | 250 kcal |
| Protein | 6 g |
| Carbohydrates | 50 g |
| Fat | 2 g |

For further inspiration and technique refinement, visit our complete Italian pasta guide or explore expert advice on the history and science of potato selection on Serious Eats.
Q&A
Q&A: Mastering Homemade Italian Gnocchi – A Simple Guide
Q1: What exactly is gnocchi, and why is it so beloved in Italian cuisine?
A1: gnocchi are pillowy little dumplings traditionally made from potatoes, flour, and sometimes eggs. Think of them as Italy’s cuddly pasta clouds-soft, tender, and perfect for soaking up sauces. Their delicate texture and versatility have made them a staple comfort food, loved across generations and regions.
Q2: Do I really need special equipment to make gnocchi at home?
A2: Not at all! While a gnocchi board or fork can give your dumplings those classic ridges for better sauce cling, your fingers or any fork will do just fine. The real magic is in the dough and your gentle touch.
Q3: How crucial is the type of potato used, and which should I choose?
A3: The potato is the heart and soul of gnocchi. Starchy varieties like Russets or Yukon Golds are ideal-they yield a fluffy, light texture. Waxy potatoes, on the other hand, tend to make denser gnocchi, so best to steer clear for that melt-in-your-mouth experience.Q4: Can gnocchi dough be made in advance?
A4: absolutely! You can prepare the dough ahead of time and refrigerate it for up to 24 hours, tightly wrapped. Just bring it back to room temperature before rolling and shaping. For longer storage, gnocchi can also be frozen uncooked, placed on a tray, then transferred to a bag once firm.
Q5: How do I know when gnocchi are cooked perfectly?
A5: It’s a simple,charming dance! Drop your gnocchi into boiling salted water,and watch patiently. When they float to the surface-usually after 2 to 3 minutes-they’re ready to scoop out. Overcooking can make them mushy, so timing is key.
Q6: What sauces pair best with homemade gnocchi?
A6: Gnocchi are a blank culinary canvas. Classic choices include rich tomato sauce, browned butter with sage, or a creamy gorgonzola drizzle. For a fresh twist,try pesto or a light garlic and olive oil mix. The sauce is your personal signature-let your taste buds lead!
Q7: Any secret tips for getting gnocchi dough just right?
A7: Keep your potatoes dry and cool before mixing to avoid sogginess. Use just enough flour to bring the dough together-over-flouring makes gnocchi tough. and resist the urge to knead too much; gentle handling keeps them tender. Remember, less is more!
Q8: Can I make gnocchi without potatoes?
A8: Yes! While potato gnocchi reign supreme, there are delightful variations using ricotta, pumpkin, or even spinach. Each brings its own flavor and color, inviting you to experiment beyond tradition.
Q9: How do I prevent gnocchi from sticking after shaping?
A9: Dust your working surface and gnocchi lightly with flour. Arrange them spaced apart on a floured baking sheet. If freezing, freeze them in a single layer before bagging to keep them from sticking together.
Q10: Where can I find inspiration for serving gnocchi beyond the classic approach?
A10: Explore fusion flavors-try tossing gnocchi into a spicy arrabbiata sauce or serving them baked in a gratin with cheese and herbs. Gnocchi are wonderfully adaptable-turn your kitchen into a playground and savor the creativity!
Insights and Conclusions
As you wrap up your journey through the art of crafting homemade Italian gnocchi, remember that mastery comes not just from following a recipe, but from embracing the tactile dance of dough between your fingers and the joyful patience of shaping each pillowy morsel. with this simple guide in hand, you’re now equipped to transform humble potatoes and flour into clouds of comfort that carry the rich legacy of Italian tradition. So, roll up your sleeves, savor the process, and let every bite be a celebration of your newfound skill-from kitchen apprentice to gnocchi artisan.Your masterpiece awaits, and the taste of Italy is just a forkful away.